You press the side button. Nothing. You press it again, harder this time, like that’s going to help. Still nothing, just a black screen staring back at you.
Real talk, that moment is the worst. But an iPhone not turning on is usually a lot more fixable than it feels right now. Most of the time it’s a drained battery, a bad cable, or a software hiccup, not a dead phone for good. I’ve seen this a ton, and the happy ending is way more common than the horror story.
If you’re staring at an iPhone not turning on right this second, go through the fixes below in order. They run from easiest to most involved, and plenty of people never get past the first two. Grab a charger, take a breath, and let’s get your phone back.+
Why You’re Dealing With an iPhone Not Turning On (Quick Causes)
Before you start poking at buttons, it helps to know what you’re up against. An iPhone not turning on almost always comes down to one of a few causes, and knowing which one saves you a ton of guesswork.
- A drained battery. The phone ran all the way down to 0 percent, and now it needs a little time on the charger before it shows any sign of life. An old battery or a phone forgotten in a drawer can both lead here.
- A faulty cable or adapter. Frayed cables and cheap chargers fail more often than you’d think, and they usually fail quietly. The phone just never gets power.
- A frozen system or software crash. The phone is technically on, but iOS has locked up, so all you see is an iPhone black screen.
- A dirty or damaged charging port. Pocket lint packs in over time and blocks the connection between the cable and the phone.
- A failed iOS update. If an update gets interrupted, the phone can hang on a black screen or get stuck on the Apple logo.
- Water damage or hardware failure. A worn-out battery, a damaged logic board, or liquid inside the phone.
The first four are the common ones, and you can sort them out at home. The last two are less fun, and I’ll cover them near the end.
Why does this matter? Because a dead iPhone from a software freeze needs a totally different fix than one with a dead battery. People panic over an iPhone not turning on and jump straight to buying a new phone, when a simple restart would’ve done the job. Don’t be that person. A few minutes of calm troubleshooting can save you a lot of money.
Fix 1 – Charge It Properly and Be Patient
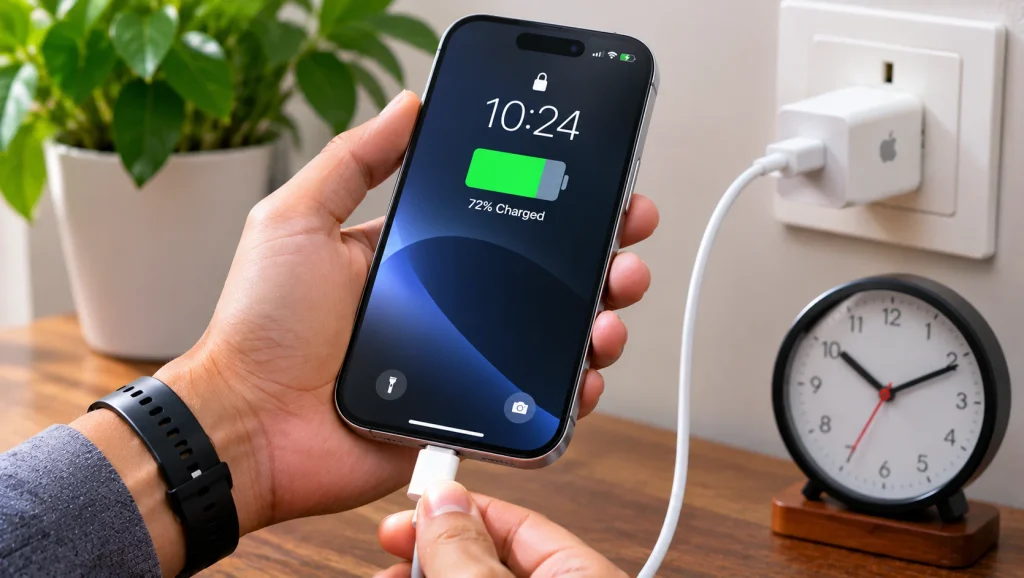
Start with the boring one, because it works more often than you’d expect. With an iPhone not turning on, power is the very first thing to rule out.
Plug your iPhone into a wall outlet, not a laptop USB port. Laptop ports often push out less power, and a battery that’s completely empty may not get enough juice to wake up. A proper wall adapter gives the phone the steady charge it needs.
Then comes the hard part: wait. Give it at least 30 minutes, and if nothing happens, stretch it closer to an hour. A fully drained battery needs time to build up a little charge before the phone can even tell you it’s charging.
What should you look for? On many iPhones, you’ll first see a charging screen: a red or empty battery icon with a lightning bolt, or a battery outline paired with a cable graphic. On a phone that’s been dead for a while, that screen can take a bit to appear. Don’t give up at minute three and assume the worst.
Resist the urge to keep unplugging and replugging it. Every time you do, you restart the clock. Just leave it alone, watch the time, and grab a coffee. Honestly, this is where a lot of people get stuck, because they quit too early.
I know waiting feels like doing nothing. But a flat battery is one of the simplest reasons for an iPhone not turning on, and it’s also the easiest one to rule out. When that’s the cause, patience really is the fix.
If the charging screen shows up, you’re in good shape. Let it charge a bit longer, then try turning the phone on normally. If you still have an iPhone not turning on after a solid hour, move on to Fix 2.
Fix 2 – Check Your Cable, Adapter, and Outlet
If your iPhone won’t charge at all, the problem might not be the phone. It might be the stuff you’re plugging it into. A lot of cases of an iPhone not turning on turn out to be a cable or adapter problem in disguise.
Work through these swaps one at a time, so you know what actually fixed it:
- Swap the cable. Try a different Apple-certified cable, ideally one that’s been working fine on another device. If you’re buying a new one, look for MFi-certified, which means it’s made under Apple’s licensing program.
- Swap the adapter. Use a different wall adapter, ideally one you know works, like the one from another iPhone or an iPad.
- Swap the outlet. Try a different wall socket. I’ve seen outlets and power strips quietly die, and it’s a silly thing to miss.
Take a good look at the cable while you’re at it. Bent connectors, frayed ends near the plug, or a loose fit at the iPhone end are all warning signs. Cables wear out, especially the ones you use every single day.
Here’s a quick bonus test if your model supports it: wireless charging. If you’ve got an iPhone 8 or later, put it on a MagSafe or Qi-compatible charger. If it starts charging wirelessly but won’t charge with a cable, that points at the charging port or the cable, not the battery.
Wireless charging is slower, so give it a good 30 minutes before you judge it. And if the phone shows nothing after you’ve tried a new cable, a new adapter, and a different outlet, the problem is probably deeper.
The good news is that a charger-related iPhone not turning on issue is easy to confirm with these swaps, so don’t skip them even when they feel tedious. Ruling out the cheap stuff first is always the smart move.
Fix 3 – Force Restart Your iPhone
Sometimes an iPhone that looks dead isn’t actually off. It’s frozen. A force restart is the quick way to shake it loose, and for a lot of people dealing with an iPhone not turning on, this is the fix that finally works.
First, keep the phone plugged in and charging for a few minutes before you try. A phone with almost no battery won’t respond to anything, so give it a head start.
Then use the steps for your model.
iPhone 8 and later (including iPhone SE 2nd and 3rd generation, and all Face ID models):
- Press and quickly release the Volume Up button.
- Press and quickly release the Volume Down button.
- Press and hold the Side button until you see the Apple logo.
iPhone 7 and iPhone 7 Plus:
- Press and hold the Volume Down button and the Side button together.
- Keep holding both until the Apple logo appears.
iPhone 6s, iPhone 6, and iPhone SE (1st generation):
- Press and hold the Home button and the Top (or Side) button together.
- Keep holding both until the Apple logo appears.
A couple of tips. The timing matters on newer models, so do the two volume presses quickly and then keep that Side button held. And be patient with that last hold. It can take around 10 seconds or more before the logo shows up, so don’t let go too early.
If you see the Apple logo, your iPhone not turning on problem might already be solved. Let the phone finish starting up and give it a minute. If it gets stuck on the logo, jump to Fix 5.
Worried this will wipe your stuff? It won’t. A force restart doesn’t delete your data. It’s basically a hard reboot, the phone equivalent of holding the power button on a frozen computer.
If the force restart does nothing at all, don’t panic. A phone with a truly empty battery can ignore it. Go back to Fix 1, let it charge longer, and try again. Repeating a force restart iPhone attempt after a longer charge is totally normal.
Fix 4 – Clean the Charging Port and Remove Your Case
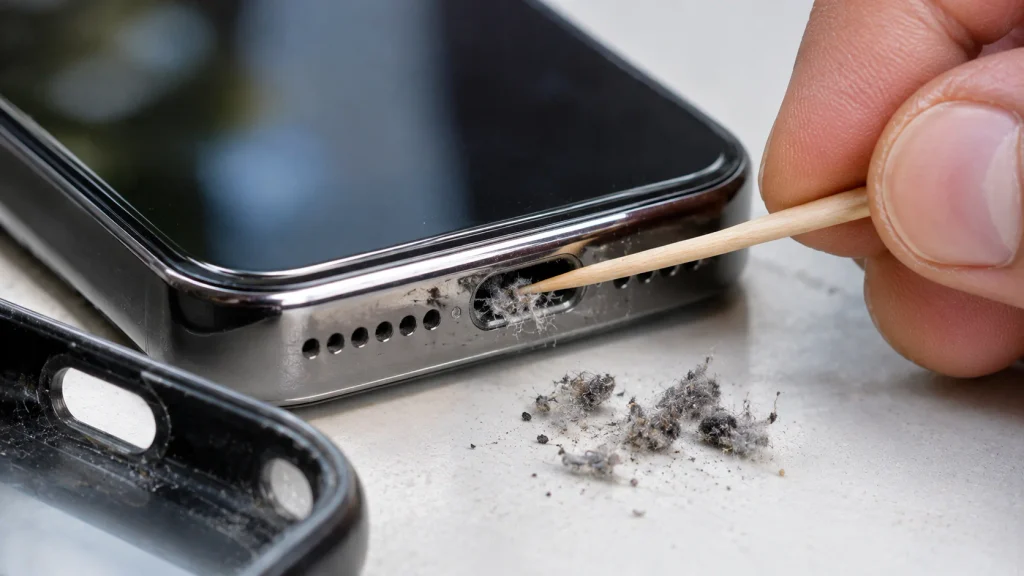
Okay, this one sounds too simple to matter, but I’ve seen it fix a “dead” phone more than once. An iPhone not turning on and refusing to charge is sometimes just lint.
The charging port is a tiny opening that lives in your pocket or bag all day. Over months, lint and dust pack down into the bottom of it. Eventually the cable can’t seat all the way, and your iPhone won’t charge no matter how long you wait.
Here’s how to clean it safely:
- Power down and unplug. If the phone is on at all, turn it off first.
- Take off the case. Thick cases can block the cable or hide debris around the port.
- Look closely with a flashlight. If you can see gray fuzz or grit down in there, that’s your culprit.
- Use something soft. A wooden or plastic toothpick, or a clean, dry, soft brush, works well. Gently scrape along the edges and pull the lint out.
And please, never use metal. A pin, paperclip, or SIM ejector tool can scratch the contacts or short something out, and then you’ve turned a small problem into an expensive one.
What about compressed air? Apple’s own cleaning advice says to avoid it, and honestly I’d skip it. It can push debris deeper or force moisture in, which is the opposite of what you want. If you do decide to use it, go easy and keep the phone powered off.
Take a moment to check the cable end too. Sometimes the lint is stuck on the plug, not just in the port. A quick wipe with a dry, soft cloth can help.
When you’re done, plug in a known-good cable and see if the charging screen pops up. If the cable now clicks in more snugly than before, you probably just found your problem.
It’s a small job, but it can fix an iPhone not turning on when nothing else does. If nothing changes, keep going.
Fix 5 – Use Recovery Mode

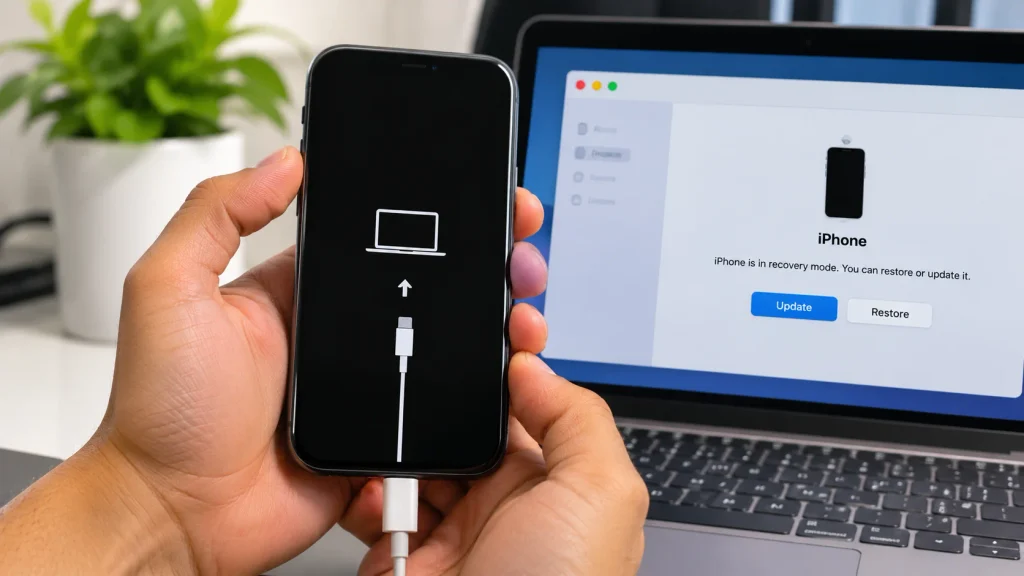
Recovery mode is your first real software fix. It helps when the phone shows the Apple logo and never moves past it, or when the screen is stuck and won’t respond to a normal restart. If your iPhone not turning on turns out to be a software problem, this is often where it gets solved.
Think of iPhone recovery mode as a way to reinstall iOS using a computer. You’ll need a Mac or a Windows PC and a working cable.
Step 1: Get your computer ready.
- On a Mac, open Finder.
- On a Windows PC, open the Apple Devices app (or iTunes if you’re on an older setup).
Step 2: Connect the iPhone. Plug it into the computer with your cable.
Step 3: Enter recovery mode. Use the steps for your model while it’s connected:
- iPhone 8 and later: press and release Volume Up, press and release Volume Down, then hold the Side button until the recovery mode screen shows up. That’s the one with a cable and computer graphic.
- iPhone 7 and 7 Plus: hold the Volume Down button until you see the recovery screen.
- iPhone 6s and earlier, and SE (1st generation): hold the Home button until you see the recovery screen.
Step 4: Pick Update or Restore. Your computer will say there’s a problem with the iPhone and offer two options. Choose Update first. This tries to reinstall iOS without erasing your data.
If Update fails, or the phone still won’t work afterward, you can try Restore. Heads up: Restore wipes the phone completely and sets it up like new. You can then restore from a backup, if you’ve got one.
One more tip. If the download takes more than about 15 minutes, the iPhone can drop out of recovery mode. If that happens, just repeat the steps. It’s annoying but normal.
And if your computer doesn’t recognize the iPhone at all, try a different cable or USB port before you assume the worst. A bad cable can look exactly like a bigger problem.
No guarantees here, of course. Recovery mode fixes plenty of software-related cases of an iPhone not turning on, but it can’t repair a damaged battery or board.
Fix 6 – Try DFU Mode (Last Software Option)
DFU mode, short for Device Firmware Update, is the deepest software fix you can try at home. Think of it as recovery mode’s tougher sibling, and the last software card to play against an iPhone not turning on.
Here’s the honest version: only try iPhone DFU mode if recovery mode didn’t work. It restores both the software and the firmware on the phone, and it erases everything on it. That includes your photos, messages, and apps if you don’t have a backup.
So before you go there, ask yourself: do you have a recent iCloud or computer backup? If the answer is yes, DFU is much less scary. If the answer is no, think hard before you wipe the phone, because that data may be gone for good.
In general, here’s how it goes:
- Connect the iPhone to your Mac or PC, with Finder or the Apple Devices app open.
- Follow the button sequence for your specific model. This part is fiddly, and the timing has to be right.
- If it works, the iPhone screen stays black, but your computer says it detected an iPhone in recovery mode.
- Choose Restore on the computer and let it finish.
I’m purposely not spelling out the exact button timing here, because it’s different from model to model, and getting it wrong is super common. Apple’s official support page has the model-specific steps, so follow those and not a random video.
Not gonna lie, DFU mode can be a bit nerve-racking the first time. If the screen shows the Apple logo at any point, the sequence went too far and you’ll need to start over. That’s totally normal, so don’t beat yourself up.
If DFU doesn’t bring your phone back either, you’re probably looking at a hardware issue, and that’s the point where an iPhone not turning on stops being a home project. Let’s talk about that.
Fix 7 – Check for Hardware or Water Damage
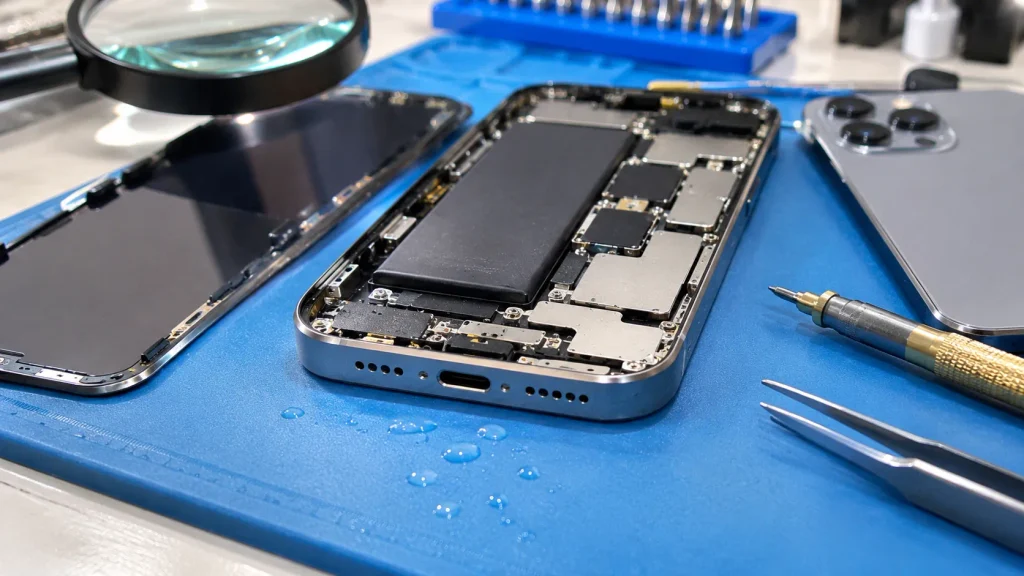
If you’ve tried everything above and you still have an iPhone not turning on, it’s time to consider that something inside might be physically wrong.
Here are some signs that point to hardware trouble:
- A bad battery. An older phone that shuts off randomly, drains super fast, or has a swollen back or a screen that’s lifting.
- A damaged logic board. The phone was working, then died suddenly after a drop or a hard knock, with no warning.
- A dropped phone. Even if the screen looks fine, impact can loosen internal connections.
- Liquid contact. iPhones have liquid contact indicators, usually visible in the SIM tray slot, that can turn red or pink if liquid got in. They’re not a perfect test, but they’re a clue.
If your phone got wet, here’s the big one: do not charge it. Plugging in a phone with liquid inside can short out the board and make things way worse. Dry the outside, keep it away from heat, and get it looked at.
Also, skip the rice trick. It doesn’t do much and can leave bits of dust in the ports.
A hardware-related iPhone not turning on often comes with clues, like a recent drop, a swollen battery, or a spill. If any of those sound familiar, that’s useful info for whoever repairs it.
This is the point where I’d say stop the DIY. Opening the phone yourself, swapping parts, or trying fixes you found in a random forum can void any coverage you’ve got and might cause even more damage. When the fixes run out, a trained technician with the right tools is the smarter move.
When to Visit Apple or a Trusted Repair Shop
So you’ve done everything and the phone’s still a brick. Now what?
When an iPhone not turning on survives every fix above, you’ve got two main routes: an Apple Store or an Apple Authorized Service Provider. Authorized providers use genuine parts and follow Apple’s repair standards, so they’re a safe bet. You can book either one through the Apple Support app or Apple’s support website, which saves you a long wait at the counter.
Here’s what to bring:
- The iPhone itself
- Your Apple ID details, since you may need to sign in
- Proof of purchase, if you have it
Before you go, check your warranty status on Apple’s website. You just enter the serial number. If you’ve got AppleCare+, a lot of repairs can be covered or cheaper, including battery issues and accidental damage, depending on your plan. It’s good to know before you walk in.
Tell the technician exactly what you tried and in what order. Describing your iPhone not turning on problem step by step, from the charging attempts to recovery mode, helps them skip the basics and get to the real cause faster.
Now for the honest part: repair or replace? For a newer iPhone, repair is usually worth it, especially if it’s covered. For an older iPhone, it gets more complicated. If the phone is several years old, a repair bill might eat up a big chunk of what a newer phone would cost. And older models eventually stop getting iOS updates, which matters for security and app support.
A reasonable rule of thumb: ask for a quote first. If the repair costs a big slice of what a replacement would run, a newer phone can be the better deal. And if the issue is just a worn-out battery on an otherwise good phone, a battery replacement is often pretty sweet value.
Whatever you decide, ask whether your data can be recovered before the repair. Sometimes it can, sometimes it can’t, and it’s better to know up front.
How to Stop Your iPhone From Dying Like This Again
Once your phone’s alive again, you’ll want to keep it that way. A few habits make a real difference, and they’re the best defense against another iPhone not turning on down the road.
- Don’t let the battery hit 0 percent all the time. Letting it run completely flat now and then isn’t a disaster, but doing it constantly wears the battery down faster. Plug in before it gets that low.
- Use certified chargers. Stick with Apple’s or MFi-certified cables and adapters. The bargain gas-station cable is rarely worth the risk.
- Keep iOS updated. Updates fix bugs that can cause freezes and crashes. Just make sure you’ve got enough battery and a steady Wi-Fi connection before you start one.
- Back up to iCloud regularly. If something does go wrong, a recent backup turns a disaster into an annoying afternoon.
- Avoid heat and moisture. Don’t leave your phone on a car dashboard in summer, and keep it away from steamy bathrooms and pools.
- Keep the port clean. Every few months, check it for lint. It takes about a minute.
None of this is complicated. Honestly, most of it comes down to treating your phone a little better than the rest of the stuff in your pocket. Do that, and an iPhone not turning on becomes a lot less likely.
FAQs About an iPhone Not Turning On
Question – Why is my iPhone not turning on even when it is charging?
Answer – The battery may be too drained to power the screen yet, or the phone could be frozen. Let it charge for at least an hour, then try a force restart. If that fails, check the cable, the port, and recovery mode before suspecting hardware damage on your iPhone not turning on.
Question – How long should I charge an iPhone not turning on?
Answer – Give it at least 30 minutes, and up to an hour if needed. A completely drained battery needs time before it can display the charging screen. Use a wall outlet and a working cable. If nothing shows after an hour, move on to the other fixes.
Question – Can an iPhone not turning on be fixed without losing data?
Answer – Often, yes. Charging, cable swaps, force restart, and cleaning the port don’t touch your data. In recovery mode, choose Update first, because it tries to reinstall iOS without erasing anything. Restore and DFU mode do erase the phone, so you’d need a backup.
Question – Is a black screen the same as an iPhone not turning on?
Answer – Not always. With a black screen, the phone might actually be on but frozen, or the display might be failing. If you hear sounds, feel vibrations, or your computer detects it, it’s likely still running. A completely dead iPhone shows no signs of life at all.
Question – Does a force restart delete data on an iPhone not turning on?
Answer – No. A force restart just reboots the phone, a bit like holding the power button on a frozen computer. Your photos, messages, and apps stay put. It’s safe to try, and it’s one of the first things worth doing when a phone freezes.
Final Thoughts
An iPhone not turning on feels like a disaster, but it’s usually something simple. Start with Fix 1, charge it properly, and give it real time. Then work your way down the list until something clicks.
Most people never need the harder stuff like recovery mode or DFU. And if you do end up at the repair counter, at least you’ll know you tried everything first. That alone makes the conversation with the technician way easier.
Did one of these fixes solve your iPhone not turning on problem? Drop a comment and tell us which one worked. It might save someone else a lot of stress.